SigInt OS 1.1 is still having several issues to be installed on VMware despite the great job done so far for the distribution. Posting a guide to install it on hard disk under Vmware.
SigInt OS comes with all needed applications for software defined radios such as RTL-SDRs and other TX capable SDRs like the HackRF, bladeRF and USRP radios. Avoiding all the compile issues.
I will try to review later another SDR oriented distribution called DragonOS, that has been very disappointing.
LEGAL WARNING:
SigIntOS use a passive IMSI catcher that does NOT interfere with a GSM network , a regular IMSI catcher pretends to be a BTS (GSM relay) which makes it intrusive and illegal for non law enforcement.
Is a passive IMSI catcher illegal? I don’t have the answer but could be in some countries. One point to note is that the personal data collected by the device (IMSI numbers) may be subject to privacy laws, so be mindful of storing/processing/sharing data this device collects. This guide if research purposes only.
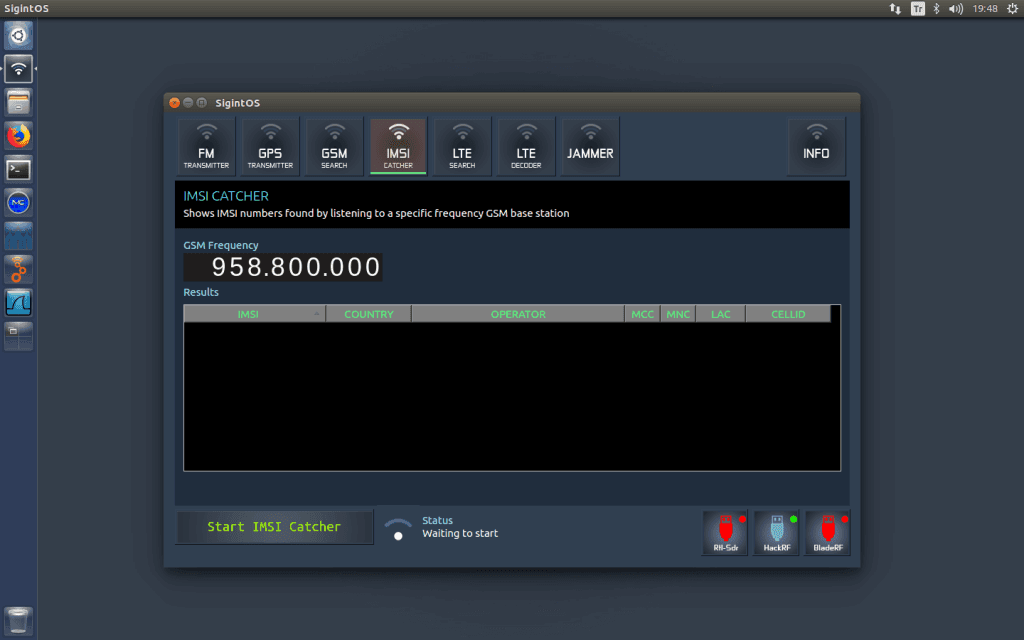
On the distribution you will find a FM and GPS transmitter, a jammer, a GSM base station search tool and an IMSI catcher. SigintOS also has various other preinstalled programs such as GNU Radio, gr-gsm, YatesBTS, wireshark, GQRX, hackRT tools and much more.
It is compatible with RTL-SDR (tested RTL-2832U), HackRF One(tested with HackRF One/ Portack) and BladeRF.
The distribution works well on live cd (non persistant), but the installer still have major issues.
Here is how I got SigInt OS 1.1 installed on VMware 15:
-Download the SigInt OS 1.1 iso
-Open VMware and created an ubuntu 64 machine with the default settings and the SigIntOS.iso as cd/dvd-rom.
-Boot in live option and switch the keyboard to english, it’s by default in Turkish.
-If you don’t type this not will generate an error “An attempt to configure apt to install additional packages from the CD failed.” and will crash the installer later. Open a terminal and type:
sudo rm /usr/lib/ubiquity/apt-setup/generators/40cdrom
-Change the source:
vi /etc/lsb-release-change the source that cause apt-get issue:
DISTRIB_CODENAME=shiva to DISTRIB_CODENAME=xenial
-Remove the previous version of ubiquity
sudo apt-get remove ubiquity
-Install the new version of ubiquity
sudo apt-get install ubiquity ubiquity-frontend-gtk
-Run an update to make sure it runs fine
sudo apt-get updateIt will generate 2 errors one for a repository certificate and one with the following message:
W: GPG error: http://ppa.launchpad.net/myriadrf/drivers/ubuntu xenial InRelease: The following signatures couldn’t be verified because the public key is not available: NO_PUBKEY 22C627172ECB91FE
W: The repository ‘http://ppa.launchpad.net/myriadrf/drivers/ubuntu xenial InRelease’ is not signed.
N: Data from such a repository can’t be authenticated and is therefore potentially dangerous to use.
N: See apt-secure(8) manpage for repository creation and user configuration details.
sudo apt-key adv --keyserver keyserver.ubuntu.com --recv-keys 22C627172ECB91FE
The other error message will be:
“Error: ** (appstreamcli:31948): CRITICAL **: Error while moving old database out of the way.
AppStream cache update failed.”
SingInt OS 1.1 comes comes with AppStream CLI tool version: 0.9.4 causing the conflict, update it and check if there’s any other conflicts.
sudo apt-get install appstream/xenial-backports
sudo apt-get update
-Start the install process and follow the step till it copies the files(time zone, keyboard, format the hard drive etc..
sudo ubiquity IMPORTANT: Open a second terminal while it copy the files and then type:
sudo mkdir /target/boot

sudo cp /cdrom/casper/initrd.gz /target/boot/initrd.gz
sudo cp /cdrom/casper/vmlinuz /boot/vmlinuz

sudo cp /cdrom/casper/vmlinuz /target/boot/vmlinuz
sudo cp /cdrom/casper/vmlinuz /boot/vmlinuz-4.15.0-43-generic

sudo cp /cdrom/casper/vmlinuz /target/boot/vmlinuz-4.15.0-43-generic
Normally you will have the message asking you to reboot. In one of the install attempted it got stuck at package 39 update for some reason, press skip if you are stuck.
After reboot you will see SigIntOS startup logo and will ask you to press enter, then it will unmount the cd (the .iso).
Once it boot from the hard drive you will have the login prompt, the default login and password is sigintos
Et voila!
Feel free to comment bellow if it didn’t work for you or even if it worked!